- Home
- About Us
- Inspection Services
- Conventional Non-Destructive Testing
- Ultrasonic Weld Scan
- Ultrasonic Thickness Gauging
- Eddy Current Testing
- Radiography Testing
- Liquid Penetrant Testing
- View More

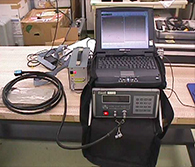
The ACFM probe introduces an electric current locally into the part and measures the associated electromagnetic fields close to the surface. The presence of a defect disturbs the associated fields and the information is graphically presented to the system operator. The ends of a defect are easily identified to provide information on defect location and length. Through wall extent of the flaw plays an important role in determining structural integrity and the same is calculated using mathematical computation thus allowing an immediate evaluation of the implication of the indication. ACFM inspection can be performed through paint and coatings, hence it is considered to be a faster and economic technique than others (E.g. magnetic particle inspection (MPI)
Applicable for base material or welds, ferritic or non-ferritic conductive metals.
Can be used on hot surfaces, underwater, or in irradiated environments.
Provides both depth and length information.
Accurate sizing of defects up to 25mm in depth.
Requires minimal surface preparation and can be applied over paint and other coatings.
Applicable for underwater inspection as well as normal inspection.
Inspection data can be stored and analysed offline.